


If you’re a music producer or synth enthusiast looking to dive into the world of drum machines and synthesizers, the Elektron Syntakt is a powerhouse that deserves your attention. Combining the best of analog and digital synthesis, this compact groovebox is a versatile tool for creating everything from punchy drum patterns to lush synth textures. In this tutorial, we’ll walk you through the basics of getting started with the Syntakt, so you can start making music right away.
What is the Elektron Syntakt?
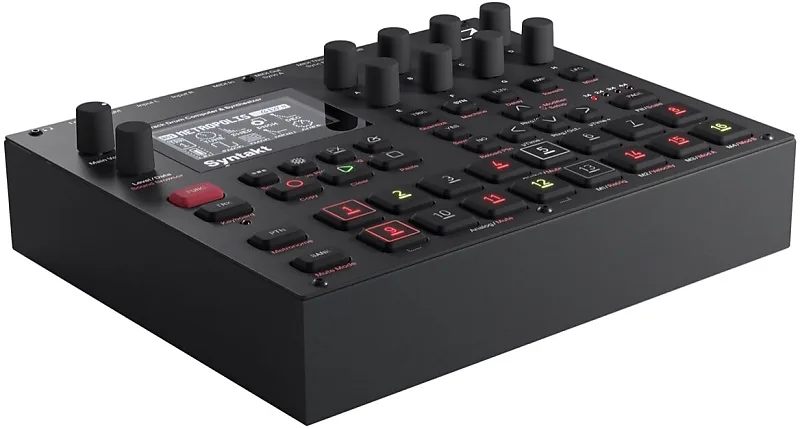
The Elektron Syntakt is a 12-track hybrid synthesizer and drum machine that blends analog and digital sound engines. Each track can be assigned to a specific sound generator, ranging from analog kick drums to digital FM synths. With its intuitive sequencer, robust effects, and hands-on controls, the Syntakt is designed for both live performance and studio production.
Step 1: Unboxing and Initial Setup
When you first unbox your Syntakt, you’ll find the unit itself, a power adapter, and a USB cable. Here’s how to get started:
- Power Up: Connect the power adapter and turn on the Syntakt. The unit will boot up, and you’ll be greeted with the default project.
- Connect Audio: Use the stereo outputs to connect the Syntakt to your speakers, audio interface, or headphones.
- MIDI and USB: If you want to sync the Syntakt with other gear or use it as a MIDI controller, connect it via MIDI cables or USB.
Step 2: Understanding the Interface
The Syntakt’s interface is divided into several sections:
- Tracks: There are 12 tracks, each with its own sound generator. Tracks 1-4 are analog, while tracks 5-12 are digital.
- Encoders and Buttons: Use the encoders to adjust parameters like pitch, decay, and filter cutoff. The buttons below the screen allow you to navigate menus and select functions.
- Sequencer: The grid of 16 buttons is used to program patterns. Each button represents a step in the sequence.
- FX Section: The Syntakt includes reverb, delay, and overdrive effects that can be applied globally or per track.
Step 3: Creating Your First Pattern
Let’s create a simple drum pattern to get familiar with the sequencer:
- Select a Track: Press the [TRACK] button and choose Track 1 (default is an analog kick drum).
- Program Steps: Press the step buttons (1-16) to create a kick drum pattern. For example, press steps 1, 5, 9, and 13 for a basic four-on-the-floor beat.
- Adjust Parameters: Turn the encoders to tweak the kick drum’s pitch, decay, and tone.
- Add a Snare: Switch to Track 2 (default is an analog snare) and program a snare on steps 5 and 13.
- Add a Hi-Hat: Move to Track 3 (default is an analog hi-hat) and program closed hi-hats on steps 3, 7, 11, and 15.
Step 4: Exploring Sound Design
The Syntakt’s sound engines are where the magic happens. Here’s how to dive deeper:
- Analog Engines: Tracks 1-4 use analog synthesis for punchy drums and bass. Experiment with the filter, envelope, and distortion settings to shape your sounds.
- Digital Engines: Tracks 5-12 offer digital synthesis, including FM, wavetable, and noise-based sounds. Try loading a digital synth on Track 5 and tweaking the waveform and modulation parameters.
- LFOs and Modulation: Use the LFOs to add movement to your sounds. For example, modulate the filter cutoff on a synth track to create a sweeping effect.
Step 5: Adding Effects
The Syntakt’s effects can take your patterns to the next level:
- Reverb: Add space and depth to your sounds. Try applying reverb to the snare or hi-hats.
- Delay: Create rhythmic echoes by adding delay to a synth or percussion track.
- Overdrive: Add grit and warmth to your drums or synths with the overdrive effect.
Step 6: Saving and Exporting
Once you’ve created a pattern you’re happy with, it’s time to save your work:
- Save the Project: Press [PROJECT] and select “Save” to store your project on the Syntakt.
- Export Audio: Connect the Syntakt to your computer via USB and use Overbridge (Elektron’s software) to export your patterns as audio files.
Tips for Advanced Users
- Parameter Locks: Use parameter locks to change settings for individual steps in your sequence. This is great for creating evolving patterns.
- Pattern Chains: Chain multiple patterns together to build full songs.
- MIDI Control: Use the Syntakt to control external gear or sync it with your DAW for a hybrid workflow.
Final Thoughts
The Elektron Syntakt is a versatile and inspiring tool for musicians of all levels. Whether you’re crafting intricate drum patterns, designing unique synth sounds, or performing live, the Syntakt offers endless possibilities. With this tutorial, you should have a solid foundation to start exploring its capabilities. So power up your Syntakt, dive in, and let your creativity flow!
Happy music-making! 🎶


