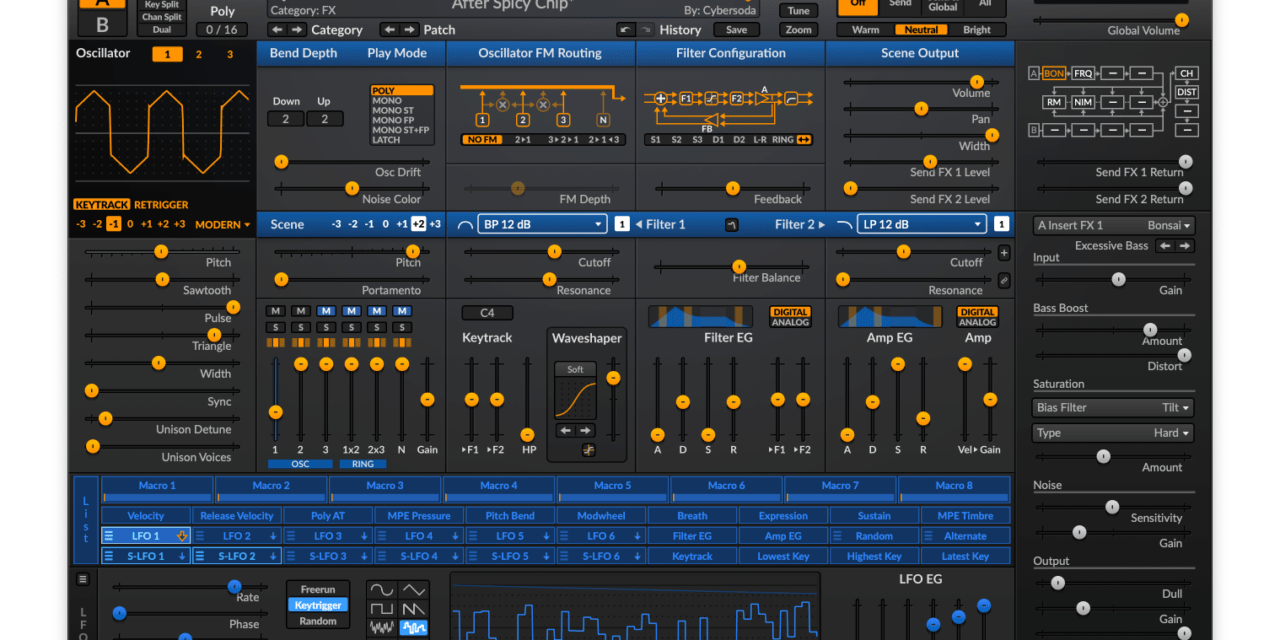
If you’re looking for a free VST synth that combines professional-grade sound quality with endless creative possibilities, Surge XT is the perfect choice. As an open-source wavetable synthesizer, Surge XT offers a wealth of features that rival many paid plugins, making it a favorite among producers and sound designers. In this tutorial, we’ll walk you through the basics of Surge XT, from installation to creating your first patch. Let’s dive in!
Step 1: Download and Install Surge XT
Before we get started, you’ll need to download and install Surge XT:
- Visit the Surge XT website (surge-synthesizer.github.io).
- Navigate to the Download section and select the version for your operating system (Windows, macOS, or Linux).
- Download the installer and follow the instructions to install Surge XT. It’s available in VST3, AU, and LV2 formats, so make sure to install it in the correct folder for your DAW.
- Open your DAW and load Surge XT as a plugin on a new track.
Step 2: Exploring the Interface
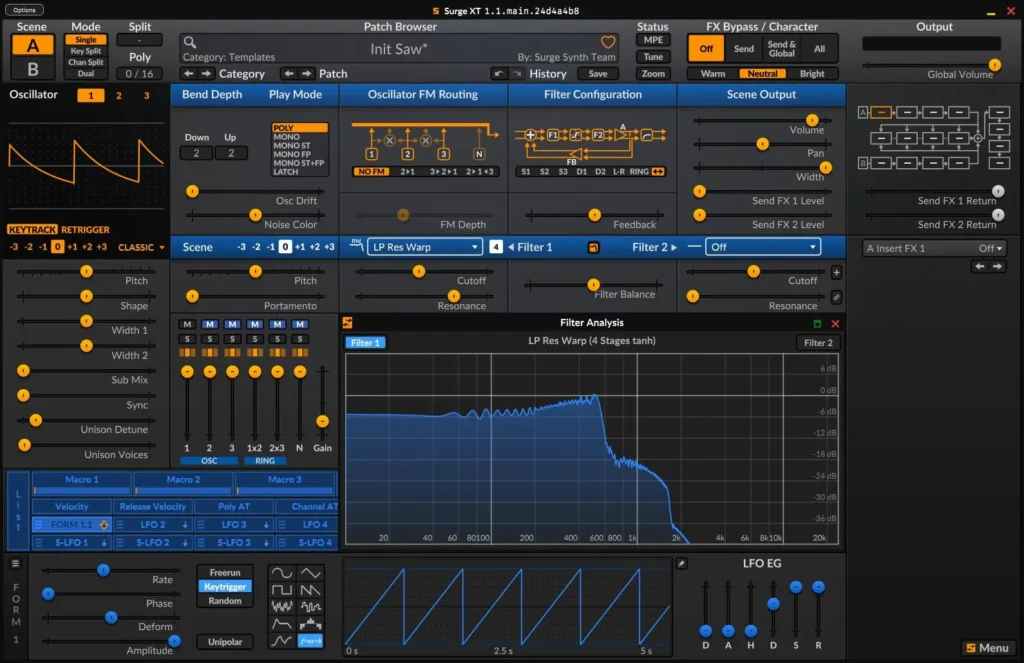
When you first open Surge XT, you’ll see a sleek, modern interface divided into several sections:
- Oscillators: Located at the top, these generate the raw sound. Surge XT features three oscillators, each with a range of wavetables and synthesis types.
- Filters: Found below the oscillators, these shape the tone of your sound.
- Modulation: The middle section includes envelopes, LFOs, and a modulation matrix for routing.
- Effects: At the bottom, you’ll find a suite of effects like reverb, delay, and distortion.
- Output: The final section controls the master output and includes a tuner and oscilloscope.
Step 3: Loading a Preset
Let’s start by loading a preset to get a feel for Surge XT’s sound:
- Click on the Patch Browser button at the top of the interface.
- Browse through the list of included presets. Surge XT comes with a wide variety of sounds, from basses and leads to pads and effects.
- Select a preset and play some notes on your MIDI keyboard or piano roll. Notice how the preset uses the oscillators, filters, and modulation to create its sound.
Step 4: Creating a Basic Bass Sound
Now let’s create a simple bass patch from scratch:
- Initialize the Patch: Click on the Patch Browser and select Init to start with a blank slate.
- Set Oscillator 1:
- Set the waveform to a basic wavetable, such as Sawtooth.
- Adjust the Pitch and Octave knobs to set the desired range.
- Set Oscillator 2:
- Turn the volume down to 0 for now. We’ll use only Oscillator 1 for this patch.
- Adjust the Filter:
- Set the filter type to Low Pass.
- Lower the Cutoff frequency to around 50% and increase the Resonance slightly to add some bite.
- Shape the Envelope:
- Set the Attack to 0 for an immediate start.
- Adjust the Decay to control how quickly the sound fades after the initial hit.
- Set the Sustain to around 50% and the Release to a short value.
- Add Some LFO Modulation:
- Set the LFO waveform to Triangle.
- Route the LFO to the Filter Cutoff by adjusting the Filter Mod knob.
- Set the LFO rate to a slow speed for a subtle, evolving effect.
Play some low notes on your MIDI keyboard, and you should hear a warm, analog-style bass sound.
Step 5: Adding Oscillator 2 for Layering
Let’s enhance our bass patch by adding Oscillator 2:
- Set Oscillator 2:
- Set the waveform to Square.
- Adjust the Pitch knob to detune it slightly from Oscillator 1 (e.g., -7 or +7 cents).
- Adjust the Mixer:
- Increase the volume of Oscillator 2 to blend it with Oscillator 1.
- Experiment with the Noise level to add some grit or texture.
Now your bass sound should have more depth and character.
Step 6: Tweaking the Filter and Envelope
To add more movement to your sound, let’s tweak the filter and envelope:
- Filter Modulation:
- Increase the Envelope Amount in the filter section to make the filter respond more dynamically to your playing.
- Envelope Adjustments:
- Shorten the Decay and increase the Sustain for a punchier sound.
- Experiment with the Release to control how the sound tails off after you release a note.
Step 7: Saving Your Patch
Once you’re happy with your sound, save it as a preset:
- Click on the Patch Browser button.
- Select Save As and give your patch a name.
- Your patch will now be available in the preset browser for future use.
Tips for Further Exploration
- Experiment with Wavetables: Surge XT comes with a wide range of wavetables. Try loading different ones into Oscillator 2 and blending them with Oscillator 1 for complex, layered sounds.
- Use the Modulation Matrix: The modulation matrix allows you to route modulation sources to virtually any parameter. Experiment with different routings for unique effects.
- Explore the Effects: Surge XT’s effects section includes reverb, delay, distortion, and more. Use these to add polish and depth to your patches.
Conclusion: Unleash Your Creativity with Surge XT
Surge XT is a powerful, free synth that offers endless possibilities for sound design. By following this tutorial, you’ve learned how to create a basic bass patch, but the potential for creativity is limitless. Whether you’re crafting basses, leads, or atmospheric pads, Surge XT is a versatile tool that rewards experimentation.
So fire up your DAW, load Surge XT, and start exploring its sonic potential. Happy sound designing! 🎛️✨

