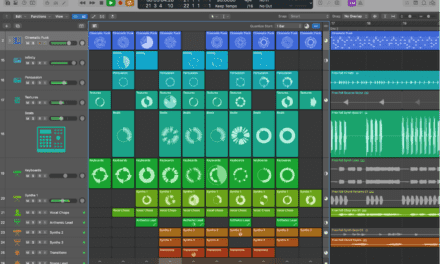
If you’re new to Logic Pro, you’re about to discover one of the most powerful and intuitive digital audio workstations (DAWs) on the market. Whether you’re a songwriter, producer, or audio engineer, Logic Pro offers the tools you need to bring your musical ideas to life. In this tutorial, I’ll walk you through the basics of setting up and using Logic Pro, so you can start creating music like a pro.
Step 1: Download and Install Logic Pro
- Purchase Logic Pro:
Logic Pro is available exclusively on the Mac App Store for $199. This one-time purchase includes all features and future updates, making it an incredible value. - Download and Install:
Once purchased, Logic Pro will download and install automatically on your Mac. The installation process is straightforward, and you’ll be ready to go in no time.
Step 2: Set Up Your Audio Interface
Before you start making music, you’ll need to set up your audio interface:
- Open Logic Pro and go to Logic Pro > Preferences > Audio (or press
Cmd+,). - Under the Audio tab, select your audio interface from the Output Device dropdown menu. If you don’t have an interface, you can use your Mac’s built-in audio.
- Set your sample rate and buffer size. A lower buffer size reduces latency but may strain your CPU, while a higher buffer size is more stable but introduces more latency. A good starting point is 44.1kHz sample rate and 256 samples buffer size.
Step 3: Create a New Project
- Start a New Project:
When you launch Logic Pro, you’ll be greeted by the Project Chooser. Click Empty Project to start from scratch, or choose a template that matches your workflow (e.g., songwriting, electronic music, film scoring). - Set Your Tempo and Time Signature:
In the transport bar at the top, you can set your project’s tempo and time signature. Click the tempo to type in a value, or use the metronome icon to enable/disable the click track.
Step 4: Add Tracks and Record Audio
- Add a Track:
Click the + button in the track header or go to Track > New Track. Choose the type of track you want to create (e.g., audio, software instrument, drummer). - Arm the Track for Recording:
Click the red Record Enable button on the track you want to record. Set the input source by clicking the input dropdown (e.g., microphone, guitar, etc.). - Record Audio:
Press the Record button in the transport bar (or pressR) to start recording. Press Stop (or pressSpacebar) when you’re done.
Step 5: Add MIDI and Virtual Instruments
- Insert a Software Instrument Track:
Click the + button and select Software Instrument. Choose an instrument from the Library on the left (e.g., Alchemy, ES2, or a third-party VST). - Open the MIDI Editor:
Double-click the MIDI region on the track to open the Piano Roll. Here, you can draw in notes, adjust velocities, and program your performance.
Step 6: Edit Your Audio and MIDI
Logic Pro’s editing tools are incredibly powerful. Here’s how to use some of the basics:
- Split Regions:
Use the Scissors Tool (pressEscand select it) to cut audio or MIDI regions at the cursor position. - Adjust Timing with Flex Time:
Enable Flex Time by clicking the Flex button in the track header. This allows you to stretch or compress audio to match your project’s tempo. - Quantize MIDI:
In the Piano Roll, select the notes you want to quantize, then go to Functions > Quantize. Choose your quantization settings and apply.
Step 7: Mix Your Tracks
- Add Effects:
Click the Audio FX or MIDI FX slot on a track to open the effects menu. Here, you can add plugins like EQ, compression, reverb, and more. Logic Pro comes with a suite of built-in effects, but you can also use third-party plugins. - Adjust Levels and Panning:
Use the faders and pan knobs in the mixer (pressXto open) to balance your tracks. - Automation:
Click the Automation button on a track and select Volume, Pan, or any plugin parameter. You can draw in automation curves or record them in real-time.
Step 8: Export Your Project
Once your project is complete, it’s time to export it:
- Go to File > Bounce > Project or Section (or press
Cmd+B). - Choose your bounce settings (e.g., WAV, MP3, etc.), set the output directory, and click Bounce.
Tips for Getting the Most Out of Logic Pro
- Explore the Library:
Logic Pro’s Library is packed with presets, loops, and samples. Spend some time browsing to find sounds that inspire you. - Use Smart Controls:
Smart Controls provide a customizable interface for tweaking plugins and instruments. Click the Smart Controls button (or pressB) to access them. - Learn Keyboard Shortcuts:
Logic Pro’s efficiency comes from its keyboard shortcuts. Spend some time learning the basics (e.g.,Rfor record,Spacebarfor play/stop) to speed up your workflow. - Check Out the Tutorials:
Logic Pro includes built-in tutorials that cover everything from basic setup to advanced techniques. Go to Help > Logic Pro Tutorials to get started.
Final Thoughts
Logic Pro is a DAW that rewards exploration and creativity. Its combination of professional-grade tools, intuitive workflow, and seamless integration with the Apple ecosystem makes it a favorite among musicians, producers, and engineers. Whether you’re recording a band, producing electronic music, or scoring a film, Logic Pro has the tools you need to bring your ideas to life.
So fire up Logic Pro, dive into its endless possibilities, and start creating. With a little practice, you’ll see why this DAW is a staple in studios around the world. Happy producing!

