If you’re new to FL Studio, you’re about to dive into one of the most popular and user-friendly digital audio workstations (DAWs) in the world. Known for its intuitive workflow, powerful features, and vibrant community, FL Studio is the go-to choice for producers across genres—from hip-hop and EDM to pop and film scoring. In this tutorial, I’ll walk you through the basics of setting up and using FL Studio, so you can start creating music like a pro.
Step 1: Download and Install FL Studio
- Purchase FL Studio:
FL Studio is available in four editions: Fruity Edition (99),∗∗ProducerEdition∗∗(99),∗∗ProducerEdition∗∗(199), Signature Bundle (299),and∗∗AllPluginsEdition∗∗(299),and∗∗AllPluginsEdition∗∗(499). The Producer Edition is the most popular choice for most users. - Download and Install:
After purchasing, download the installer from the official Image-Line website (https://www.image-line.com/). Run the installer and follow the on-screen instructions. FL Studio is available for both Windows and macOS.
Step 2: Set Up Your Audio Interface
Before you start making music, you’ll need to configure your audio settings:
- Open FL Studio and go to Options > Audio Settings (or press
F10). - Under the Output dropdown, select your audio interface. If you don’t have an interface, you can use your computer’s built-in audio.
- Set your sample rate and buffer size. A lower buffer size reduces latency but may strain your CPU, while a higher buffer size is more stable but introduces more latency. A good starting point is 44.1kHz sample rate and 512 samples buffer size.
Step 3: Create a New Project
- Start a New Project:
When you launch FL Studio, you’ll see the Start Screen. Click New from template to choose a template, or select Empty Project to start from scratch. - Set Your Tempo and Time Signature:
In the toolbar at the top, you can set your project’s tempo (BPM) and time signature. Click the tempo to type in a value, or use the metronome icon to enable/disable the click track.
Step 4: Add Instruments and Create Patterns
- Add an Instrument:
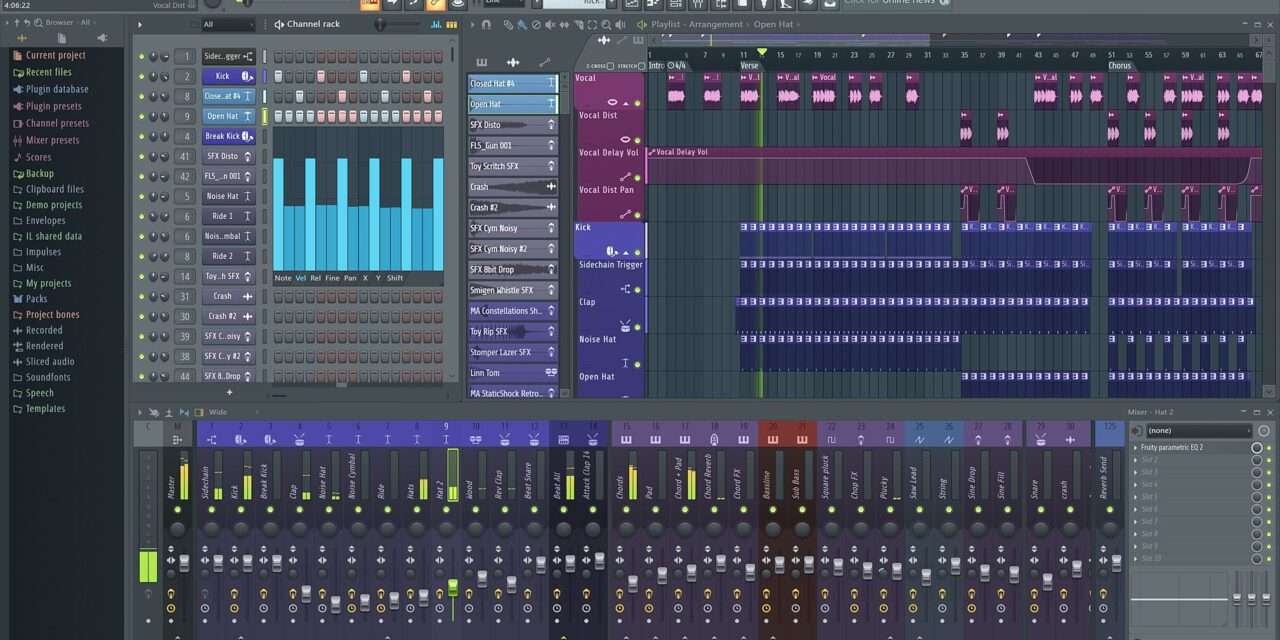
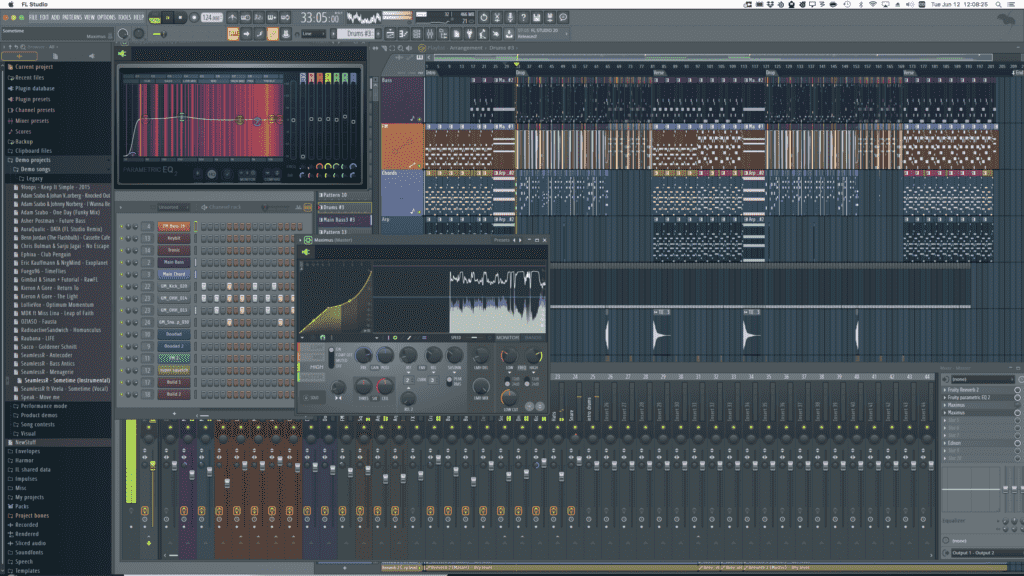
Open the Channel Rack (pressF6) and click the + button to add an instrument. You can choose from FL Studio’s built-in plugins (e.g., FLEX, Sytrus, 3xOsc) or load a third-party VST. - Create a Pattern:
In the Channel Rack, click on an instrument to open its settings. Use the Piano Roll (pressF7) to program melodies, chords, or drum patterns. You can draw in notes, adjust velocities, and quantize your performance. - Sequence Patterns:
Go to the Playlist (pressF5) to arrange your patterns into a full song. Drag and drop patterns from the Channel Rack into the Playlist to create your arrangement.
Step 5: Record Audio
- Add an Audio Track:
In the Mixer (pressF9), click an empty track and set its input source to your microphone or instrument. - Arm the Track for Recording:
Click the Record button on the Mixer track and select Audio from the dropdown menu. - Start Recording:
Press the Record button in the transport bar (or pressR) to start recording. Press Stop (or pressSpacebar) when you’re done.
Step 6: Edit Your Audio and MIDI
FL Studio’s editing tools are incredibly powerful. Here’s how to use some of the basics:
- Split Clips:
Use the Slice Tool (pressAlt+X) to cut audio or MIDI clips in the Playlist. - Adjust Timing with Slip Editing:
HoldAltwhile dragging the edges of an audio clip to trim or extend it without affecting the rest of the arrangement. - Quantize MIDI:
In the Piano Roll, select the notes you want to quantize, then go to Tools > Quantize. Choose your quantization settings and apply.
Step 7: Mix Your Tracks
- Add Effects:
In the Mixer, click an insert slot to add an effect plugin. FL Studio comes with a suite of built-in effects, including EQ, Compressor, Reverb, and Delay. - Adjust Levels and Panning:
Use the faders and pan knobs in the Mixer to balance your tracks. - Automation:
Right-click any parameter (e.g., volume, pan, plugin settings) and select Create Automation Clip. Draw in automation curves in the Playlist to create dynamic changes over time.
Step 8: Export Your Project
Once your project is complete, it’s time to export it:
- Go to File > Export > WAV/MP3/OGG.
- Choose your export settings (e.g., bit depth, sample rate), set the output directory, and click Start.
Tips for Getting the Most Out of FL Studio
- Explore the Browser:
FL Studio’s Browser (pressAlt+F8) is packed with presets, loops, and samples. Spend some time browsing to find sounds that inspire you. - Use Patcher:
Patcher is a powerful tool for creating custom instrument and effect chains. Experiment with it to design unique sounds. - Learn Keyboard Shortcuts:
FL Studio’s efficiency comes from its keyboard shortcuts. Spend some time learning the basics (e.g.,Spacebarfor play/stop,Ctrl+Nfor a new project) to speed up your workflow. - Check Out the Tutorials:
FL Studio includes built-in tutorials that cover everything from basic setup to advanced techniques. Go to Help > Help Index to get started.
Final Thoughts
FL Studio is more than just a DAW—it’s a creative playground that empowers you to bring your musical ideas to life. Its combination of intuitive design, powerful features, and lifetime updates makes it a standout choice for producers of all levels. Whether you’re crafting your first beat or producing a chart-topping hit, FL Studio has the tools you need to succeed.
So fire up FL Studio, dive into its endless possibilities, and start creating. With a little practice, you’ll see why this DAW has become a legend in the world of music production. Happy beat-making!

