


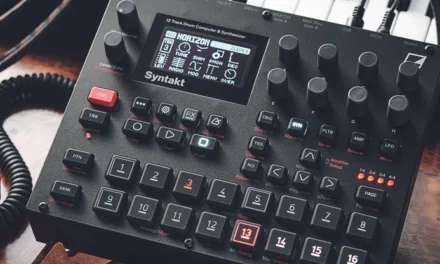
The Elektron Digitakt II has arrived, and it’s everything we loved about the original Digitakt—but better. With enhanced features, improved workflow, and even more creative potential, the Digitakt II is a dream come true for producers, beatmakers, and live performers. Whether you’re upgrading from the original or diving into the Elektron ecosystem for the first time, this tutorial will guide you through the essentials and help you unlock the full power of the Digitakt II.
What’s New in the Digitakt II?
Before we dive into the tutorial, let’s quickly highlight what makes the Digitakt II stand out:
- Increased Polyphony: Now with 12 voices (up from 8), you can create more complex and layered arrangements.
- Stereo Sampling: Finally! The Digitakt II supports stereo sampling, opening up new possibilities for rich, immersive sounds.
- Enhanced Storage: More onboard storage means more samples and projects at your fingertips.
- Improved Connectivity: Updated MIDI and USB-C connections make it easier to integrate with your setup.
- Refined Interface: A brighter OLED screen and improved button layout enhance usability.
With these upgrades, the Digitakt II is more versatile and powerful than ever. Let’s get started!
Step 1: Setting Up Your Digitakt II
- Power Up: Connect the Digitakt II to a power source using the included USB-C cable. Turn it on, and you’ll see the sleek new home screen.
- Audio Connections: Plug your headphones or monitors into the stereo outputs. For stereo sampling, connect your audio source to the inputs.
- MIDI Setup (Optional): Use the MIDI input/output ports to control external synths or drum machines.
- Overbridge Integration: Install Elektron’s Overbridge software and connect the Digitakt II via USB-C for seamless DAW integration.
Step 2: Loading and Editing Samples
The Digitakt II’s stereo sampling capability is a game-changer. Here’s how to load and edit samples:
- Load a Sample:
- Press Func + Yes to enter the sample manager.
- Use the knobs to browse and select a sample from the internal library or your own collection.
- Press Yes to load the sample onto a track.
- Trim and Normalize:
- Press Func + Track Button to enter the sample editor.
- Use the knobs to adjust the start and end points of the sample.
- Normalize the sample to ensure consistent volume levels.
- Assign to a Track:
- Press a Trig Button (1-12) to assign the sample to a track.
- Use the knobs to adjust parameters like pitch, filter, and amp envelope.
Step 3: Creating a Beat
With 12 voices and stereo sampling, your beats can now be bigger and bolder than ever.
- Enter the Sequencer:
- Press Play to start the sequencer.
- Press Record to enter record mode.
- Add Triggers:
- Press the Trig Buttons to place notes on the grid.
- Use the Knobs to adjust the velocity and timing of each trigger.
- Parameter Locks (P-Locks):
- Hold a Trig Button and turn a knob to lock a parameter to that step.
- For example, you can lock a filter sweep or pitch change to a specific step.
- Conditional Triggers:
- Press Func + Trig Button to set a conditional trigger.
- Choose from options like “Fill,” “Random,” or “Neighbor” to add variation to your sequence.
Step 4: Adding Effects and Modulation
The Digitakt II’s effects and modulation options are more powerful than ever.
- Effects:
- Press Func + Track Button to access the effects menu.
- Use the knobs to adjust reverb, delay, and other effects.
- LFOs:
- Press Func + LFO Button to enter the LFO menu.
- Assign the LFO to parameters like pitch, filter, or volume.
- Adjust the LFO shape, rate, and depth to create evolving sounds.
- Envelopes:
- Press Func + Amp Button to access the amp envelope.
- Adjust the attack, decay, sustain, and release to shape your sound.

Step 5: Sequencing External Gear
The Digitakt II’s MIDI capabilities make it a powerful hub for your entire setup.
- Set Up MIDI Tracks:
- Press Func + Track Button to assign a track to MIDI.
- Use the knobs to set the MIDI channel and note values.
- Sequence External Gear:
- Use the Trig Buttons to enter notes in the sequencer.
- Apply P-Locks and Conditional Triggers to add variation.
- Sync with Your DAW:
- Connect the Digitakt II to your computer via USB-C.
- Use Overbridge to sync the Digitakt II’s sequencer with your DAW.
Step 6: Saving and Exporting Your Work
Once you’ve created something you’re proud of, it’s time to save and export.
- Save Your Project:
- Press Func + Save Button to save your project.
- Use the knobs to name your project and press Yes to confirm.
- Export Your Tracks:
- Connect the Digitakt II to your computer via USB-C.
- Use Overbridge to export individual tracks or the full mix.
Tips and Tricks for Getting the Most Out of Your Digitakt II
- Leverage Stereo Sampling: Take full advantage of the Digitakt II’s stereo sampling capability to create rich, immersive sounds. Experiment with stereo field modulation and panning to add depth to your tracks.
- Explore the New Polyphony: With 12 voices, you can create more complex arrangements. Layer multiple samples, use long pads, or create intricate drum patterns without running out of voices.
- Use Overbridge for Multitrack Recording: Overbridge makes it easy to multitrack your recordings directly into your DAW. This is a game-changer for mixing and post-production.
- Combine with Other Gear: The Digitakt II’s enhanced MIDI capabilities make it a perfect hub for your setup. Use it to sequence synths, drum machines, and effects pedals for a fully integrated setup.
Conclusion: The Future of Sampling and Sequencing
The Elektron Digitakt II is more than just an upgrade—it’s a leap forward in sampling and sequencing technology. With its enhanced features, improved workflow, and expanded creative potential, the Digitakt II is the ultimate tool for modern music production.
This tutorial has covered the basics, but the real magic happens when you start exploring and experimenting. So fire up your Digitakt II, dive into the menus, and let your creativity flow. Whether you’re crafting beats, designing sounds, or sequencing external gear, the Digitakt II is your ultimate creative companion.
Happy beatmaking!


